Welcome to pydgilib’s documentation!
Pydgilib provides python bindings for Atmel® Data Gateway Interface (DGI) devices. See the Data Gateway Interface user guide for further details. This package works best if you have Atmel Studio 7.0 installed. If you do it will automatically make use of the installed files it requires. Otherwise you can download the required DLL from Atmel here and point pydgilib to the location where you downloaded the file.
Features
The main features of this library are:
It wraps the C functions of DGILib in python functions
It provides a class to easily log data from the power and gpio interfaces to a .csv file or a plot (using matplotlib)
It provides a function that wraps atprogram.exe and make.exe so it can compile projects and flash them to a board
The documentation of all the functions can be found in this overview or this list.
Installation
You will need to install pydgilib in a 32-bit Python environment on Windows because DGILib.dll is compiled for 32-bit. Other operating systems are not supported.
Installation via Pip
This package is hosted here on PyPI. The easiest way to install it is via pip.
$ pip install pydgilib
Static Installation
If you want to install a static copy of the master you can run:
$ pip install git+https://github.com/EWouters/pydgilib
Development Installation
Clone the repo:
$ git clone https://github.com/EWouters/pydgilib.git
$ cd pydgilib
Install symlinked to repo:
$ pip install -e .
If you want to be able to run the tests or compile the docs run instead:
$ pip install -e .[test,docs]
Getting Started
Connect your device that supports DGI
Print the serial number of your device:
>>> from pydgilib import DGILib
>>> with DGILib() as dgilib:
...     print(dgilib.device_sn)
...
b'ATML3138061800001604'
Log the current of the board and the states of the gpio pins for one second and write the results to .csv files:
>>> from pydgilib_extra import DGILibExtra
>>> with DGILibExtra() as dgilib:
...     dgilib.logger.log(1)
...
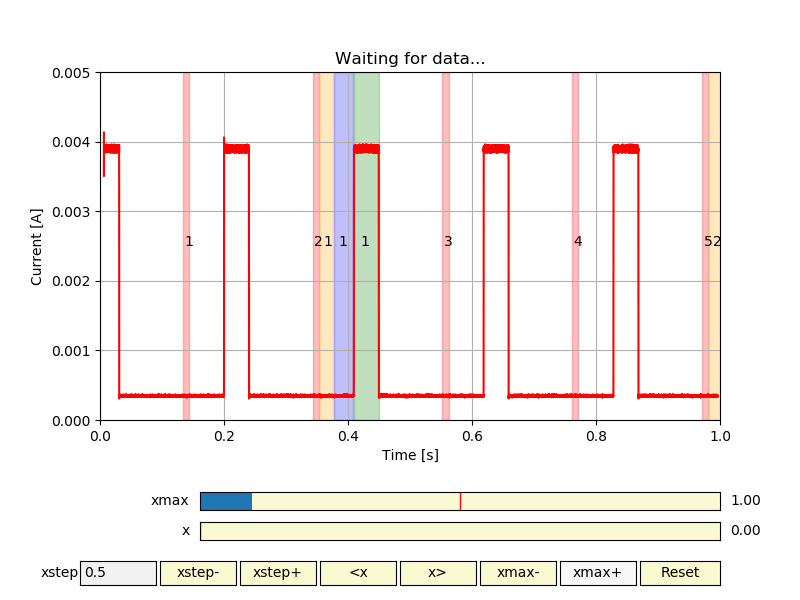
Log the current of the board and the states of the gpio pins for one second and show a plot of the results:
>>> from pydgilib_extra import DGILibExtra, LOGGER_PLOT
>>> with DGILibExtra(loggers=[LOGGER_PLOT]) as dgilib:
...     dgilib.logger.log(1)
...
{48: <pydgilib_extra.dgilib_data.InterfaceData object at 0x00F22A90>, 256: <pydgilib_extra.dgilib_data.InterfaceData object at 0x00F229F0>}

Plot of a SAML11 board running the unit test project.
Indices and tables
Code Coverage Report
Continuous Integration
This project has been developed to include an extensive set of unit tests using pytest <https://pytest.org>), as well as auto generated documentation using Sphinx <https://www.sphinx-doc.org>. Maintainers can push new releases to pip using twine.
Update Documentation
Make sure to set up a development installation of pydgilib as explained in the readme before you start. Open a terminal in the root of the repository.
Navigate to the output folder of the documentation:
$ cd docs/_build/html
2. If you have not cloned the gh-pages branch previously (otherwise switch to the gh-pages branch):
$ git clone --branch gh-pages https://github.com/EWouters/pydgilib.git
Generate the docs:
$ cd ..
$ make.bat html
4. Add the new docs to a commit and push to the live webpage <https://ewouters.github.io/pydgilib/>:
$ cd _build/html
$ git add .
$ git commit - m 'Update docs.'
$ git push origin gh-pages
Push a new Release
This will update the package on pip. You will need to login to a pip account with maintainers privileges to perform step 4.
Set version tag in setup.py and docs/conf.py
Generate docs (as described above)
Generate new package:
$ python setup.py sdist bdist_wheel
Push the package to pip:
$ twine upload dist/*
Disclaimer
Atmel® is a trademark of Atmel Corporation, which is not affiliated with the makers of this product. Atmel Studio and DGILib are products of Atmel Corporation.